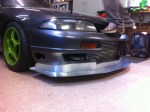
After seemingly endless research into aero parts, ground affect and materials, we decided to press ahead and fabricate our own front splitter with integrated undertray.
A quick bit of theory first: For the full benefit of the front splitter we really need to add canards to help maintain high-pressure around the front and to discourage it from spilling under the side of the car. Additionally the lower pressure generated by smoothing / accelerating the airflow under the engine, is likely to be much more beneficial if we continue the smooth surface / under tray all the way back to the rear axle where it would then smoothly expand up and out to rejoin the air behind the car (via a diffuser). Otherwise the air will become turbulent after our diffuser and slow down, causing a build up of air upstream (increasing-pressure). However, in order to add this much needed mid body undertray, we need somewhere for the air in the engine bay to go; the cooling only works when the air can pass through after all. So rather than sending it out of the engine bay around the bell housing and dumping it under the car (adding more turbulence, creating more pressure, loosing ground affect) we would want to vent it out of the bonnet where the pressure above the bonnet was quite low (as close to the radiator as possible where the air is accelerating over the curve of the bonnet but well before it encounters the windscreen). In doing this we reduce the air getting under the car to start with, and with a full under tray and diffuser, keep the air flowing quickly and smoothly (attached)… once it expands and slow at the rear of the car via the diffuser it suddenly has a dramatic drop in pressure and this is directly below the rear wing… which helps ‘drive’ the rear wing. So eventually we need all the components to work together to be collectively beneficial.
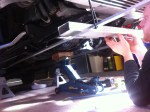
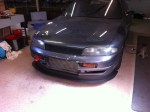
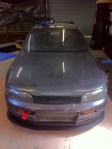
However, without venting the bonnet just yet, the undertray stops just short of the firewall, allowing the ‘cooling’ air to continue it’s ‘stock’ path of passing out under the car…
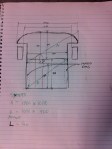
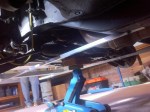
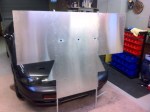
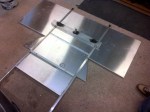
That’s the theory out of the way, now to the practical… First job was to measure up and begin mounting some 0.6mm alu-sheet with angle. The design was a fairly organic affair as we address needs as they came up and built it functionally – the final form wasn’t really completely known to us until it was almost complete.
The hardest part here was making the mounts strong yet easy to get to as we didn’t expect to be able to have this on when we put the car on the trailer.
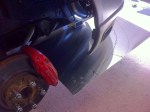
The whole thing is almost entirely aluminium, the final finishing step was to as a small amount of 7mm ply to the bottom surface, sand the front lip to a smooth roll off and paint it black on the underside. This did add some weight overall, but gave it enormous strength through the lamination and the paint will aid us in finding any scrapes.
It takes 1 person about 3 minutes to mount this, it weighs less than 8kgs, cost about $40 in materials – and best of all we can simply add / remove it during a session to measure its benefits.